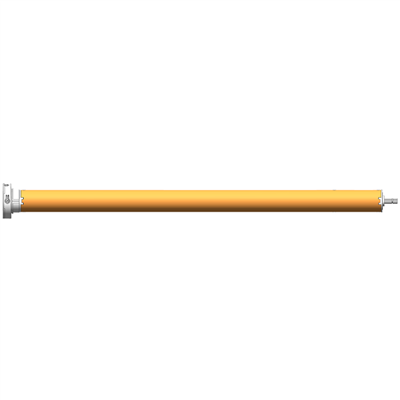
Installing a limit switch on a motorized awning motor is a crucial step to ensure the safe and efficient operation of your awning system. As a trusted supplier of Motorized Awning Motors, I've had the opportunity to work with various models and understand the intricacies of the installation process. In this blog post, I'll guide you through the steps of installing a limit switch on a motorized awning motor, providing you with the knowledge and confidence to complete the task successfully.
Understanding the Importance of Limit Switches
Before we dive into the installation process, let's first understand why limit switches are essential for motorized awning motors. A limit switch is a device that automatically stops the motor when the awning reaches its fully extended or retracted position. This prevents the motor from overworking, which can lead to premature wear and tear, and also protects the awning fabric from damage. By installing a limit switch, you can ensure the longevity of your motorized awning system and enhance its overall safety.
Tools and Materials You'll Need
To install a limit switch on your motorized awning motor, you'll need the following tools and materials:
- Screwdriver set
- Wire strippers
- Electrical tape
- Multimeter (optional but recommended for testing)
- Limit switch compatible with your motorized awning motor
- Electrical wires
Step 1: Identify Your Motorized Awning Motor
The first step in installing a limit switch is to identify the type of motorized awning motor you have. At our company, we offer a range of high-quality motors, including the 45mm Standard Tubular Motor, 45mm Radio Tubular Motor, and 45mm Electronic Radio Tubular Motor. Each motor may have specific requirements for limit switch installation, so it's important to refer to the motor's user manual or contact our technical support team for guidance.
Step 2: Turn Off the Power
Before you begin any electrical work, it's crucial to turn off the power supply to the motorized awning motor. This will prevent any electrical shocks or accidents during the installation process. Locate the circuit breaker or switch that controls the power to the motor and switch it off.
Step 3: Locate the Motor and Access the Wiring
Once the power is off, locate the motorized awning motor. It is usually installed inside the awning tube or in a nearby housing. Use a screwdriver to remove the access panel or cover to expose the motor and its wiring.
Step 4: Identify the Wiring for the Limit Switch
Carefully examine the motor's wiring to identify the wires that will be used to connect the limit switch. In most cases, the limit switch will require two wires: one for the power supply and one for the control signal. Refer to the motor's wiring diagram or the limit switch's installation instructions for specific details.
Step 5: Prepare the Limit Switch
Before connecting the limit switch to the motor, you'll need to prepare it for installation. Use wire strippers to remove a small portion of the insulation from the ends of the wires on the limit switch. This will expose the bare wire, which will be used for connection.
Step 6: Connect the Limit Switch to the Motor
Once the limit switch is prepared, it's time to connect it to the motor. Connect the power wire from the limit switch to the appropriate power source on the motor. This may be a positive or negative terminal, depending on the motor's design. Next, connect the control signal wire from the limit switch to the corresponding control terminal on the motor. Make sure the connections are secure and tight to prevent any loose connections or electrical shorts.
Step 7: Secure the Limit Switch
After connecting the limit switch to the motor, use a screwdriver to secure the limit switch in place. Make sure it is positioned in a location where it can accurately detect the fully extended and retracted positions of the awning. You may need to adjust the position of the limit switch slightly to ensure proper operation.
Step 8: Test the Limit Switch
Once the limit switch is installed and secured, it's time to test it to ensure it is working properly. Turn on the power supply to the motorized awning motor and operate the awning using the control switch. As the awning reaches its fully extended or retracted position, the limit switch should automatically stop the motor. If the motor does not stop, or if it stops at the wrong position, you may need to adjust the limit switch or check the wiring connections.
Step 9: Reassemble the Motor and Housing
After testing the limit switch and ensuring it is working properly, reassemble the motor and its housing. Use a screwdriver to replace the access panel or cover and secure it in place. Make sure all the screws are tightened to prevent any loose parts or vibrations.
Step 10: Final Checks and Adjustments
Once the motor and housing are reassembled, perform a final check to ensure everything is in order. Operate the awning several times to confirm that the limit switch is functioning correctly. If necessary, make any additional adjustments to the limit switch or the motor's settings to ensure optimal performance.
Conclusion
Installing a limit switch on a motorized awning motor is a relatively straightforward process that can significantly enhance the safety and performance of your awning system. By following the steps outlined in this blog post and referring to the motor's user manual or our technical support team, you can successfully install a limit switch on your motorized awning motor. If you have any questions or need further assistance, please don't hesitate to contact us. We're here to help you make the most of your motorized awning system.
If you're in the market for a high-quality motorized awning motor or need to purchase a limit switch, we invite you to explore our product range. Our 45mm Standard Tubular Motor, 45mm Radio Tubular Motor, and 45mm Electronic Radio Tubular Motor are designed to provide reliable and efficient operation for your awning system. Contact us today to discuss your specific requirements and explore our purchasing options.

References
- Manufacturer's user manuals for motorized awning motors
- Limit switch installation instructions
- Electrical safety guidelines and standards