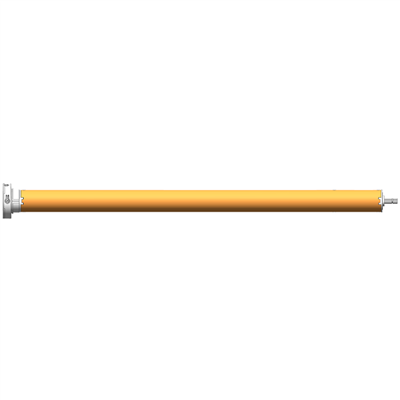
Installing a smart remote control tubular motor on a window can significantly enhance the functionality and convenience of your window treatments. As a supplier of high - quality smart remote control tubular motors, I'm here to guide you through the installation process step by step.
1. Preparation
Before you start the installation, it's crucial to gather all the necessary tools and materials. You will need a measuring tape, a drill, screwdrivers (both flat - head and Phillips), a ladder, and of course, the smart remote control tubular motor. At our company, we offer a variety of tubular motors, such as the 25mm Standard Tubular Motor, 25mm Electronic Radio Tubular Motor, and 25mm Battery Electronic Radio Tubular Motor. Make sure to choose the motor that suits your window size and requirements.
2. Measuring the Window
Accurate measurement is the key to a successful installation. Measure the width and height of the window opening. For the width, measure at the top, middle, and bottom of the window. Record the smallest measurement to ensure a proper fit. For the height, measure from the top of the window opening to the sill. These measurements will help you determine the correct size of the tubular motor and the window covering.
3. Mounting the Brackets
The brackets are used to hold the tubular motor in place. First, mark the positions for the brackets on the window frame. Make sure the brackets are level and evenly spaced. Then, use a drill to create holes in the marked positions. Insert the wall plugs into the holes and secure the brackets using screws. The brackets should be firmly attached to the window frame to support the weight of the motor and the window covering.
4. Installing the Tubular Motor
Once the brackets are in place, it's time to install the tubular motor. Carefully place the motor into the brackets. Make sure the motor is aligned correctly and sits securely in the brackets. Some motors come with a locking mechanism to keep them in place. Engage this mechanism if available.
5. Connecting the Power Supply
Depending on the type of tubular motor you have chosen, you will need to connect it to a power source. If you have a wired motor, you will need to connect it to an electrical outlet. Make sure to follow the electrical safety guidelines and turn off the power before making any connections. For battery - operated motors, simply insert the batteries according to the manufacturer's instructions.
6. Attaching the Window Covering
After the motor is installed and powered, it's time to attach the window covering. This could be a roller blind, a shade, or any other type of window treatment. Most tubular motors come with a mechanism for attaching the window covering. Follow the instructions provided with the motor to attach the covering securely.
7. Programming the Remote Control
Once the window covering is attached, you need to program the remote control. Each motor has a specific programming procedure. Usually, you will need to press a series of buttons on the remote control to pair it with the motor. Follow the instructions in the user manual to program the remote control. You can set the up and down positions, as well as any other functions such as timer settings or group control.


8. Testing the Installation
After programming the remote control, it's time to test the installation. Use the remote control to operate the window covering. Check if the motor runs smoothly and the window covering moves up and down without any issues. If there are any problems, such as the motor not running or the window covering getting stuck, refer to the troubleshooting section in the user manual.
9. Final Checks
Before considering the installation complete, make a final check of the entire setup. Ensure that the motor is running quietly and that the window covering is properly aligned. Check the connections to make sure they are secure. Also, test the remote control from different distances and angles to ensure reliable operation.
Benefits of Using a Smart Remote Control Tubular Motor
Installing a smart remote control tubular motor on your window offers several benefits. Firstly, it provides convenience. You can operate the window covering from anywhere in the room with the touch of a button. This is especially useful for large windows or windows that are difficult to reach. Secondly, it enhances the aesthetic appeal of your window. The motorized window covering gives a modern and sleek look to your space. Thirdly, it can improve energy efficiency. You can easily adjust the window covering to block out sunlight during hot days, reducing the need for air - conditioning.
Contact Us for More Information
If you have any questions about the installation process or if you are interested in purchasing a smart remote control tubular motor, we are here to help. Our team of experts can provide you with detailed advice and support. Whether you need assistance in choosing the right motor for your window or have any technical questions, feel free to reach out to us. We are committed to providing high - quality products and excellent customer service.
References
- Manufacturer's user manuals for smart remote control tubular motors
- General guidelines for electrical installations
- Window treatment installation guides