In the modern era of smart living, voice control has emerged as a revolutionary feature, bringing unparalleled convenience and sophistication to various home appliances and systems. Among these, the automatic awning motor is no exception. As a leading supplier of motors for automatic awnings, I am excited to share a comprehensive guide on how to set up voice control for an automatic awning motor.
Understanding the Basics of Voice - Controlled Automatic Awning Motors
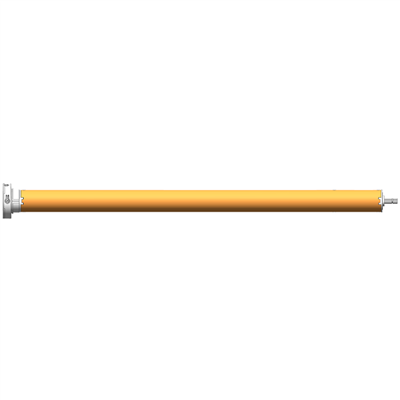
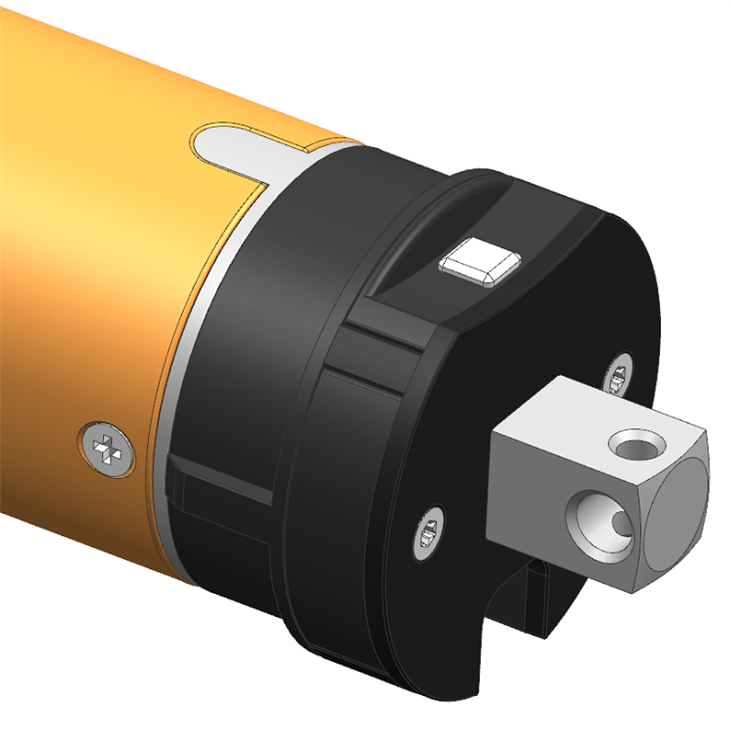
Before delving into the setup process, it's essential to understand the fundamental components involved. An automatic awning motor is the core device that drives the awning to extend or retract. Our company offers a range of high - quality motors, including the 59mm Electronic Radio Tubular Motor, the 59mm Manual Radio Tubular Motor, and the 59mm Standard Tubular Motor. Each of these motors has its unique features and capabilities, but they can all be integrated with voice - control systems to enhance user experience.
Voice control systems typically rely on smart home hubs or virtual assistants such as Amazon Alexa, Google Assistant, or Apple HomeKit. These platforms act as the intermediary between the user's voice commands and the automatic awning motor, translating the spoken words into actionable instructions.
Prerequisites for Setting Up Voice Control
- Compatible Motor: Ensure that your automatic awning motor is compatible with voice - control systems. Most modern motors come with built - in smart features or can be retrofitted with additional modules to enable voice control. Our range of motors is designed to be easily integrated with popular smart home platforms.
- Smart Home Hub or Virtual Assistant: You will need a smart home hub or a device with a virtual assistant installed. For example, an Amazon Echo device for Alexa, a Google Home device for Google Assistant, or an Apple HomePod for HomeKit.
- Stable Internet Connection: A reliable Wi - Fi network is crucial for seamless communication between the smart home hub, the motor, and the virtual assistant. Make sure your home network has a strong signal and sufficient bandwidth.
- Mobile App: Download the mobile app associated with your motor and the smart home platform. These apps will be used to configure and manage the voice - control settings.
Step - by - Step Setup Process
Step 1: Install and Connect the Motor
First, install the automatic awning motor according to the manufacturer's instructions. This usually involves mounting the motor onto the awning structure and connecting it to the power supply. Make sure all electrical connections are secure and comply with local electrical codes.
Step 2: Connect the Motor to the Smart Home Hub
- Power on the Motor: Ensure that the motor is powered on and in pairing mode. This may involve pressing a specific button on the motor or using the mobile app to initiate the pairing process.
- Open the Smart Home App: Launch the app associated with your smart home hub (e.g., the Alexa app, Google Home app, or Home app for Apple).
- Add a New Device: Look for the option to add a new device in the app. Select the type of device as an awning motor or a smart home accessory.
- Search for Devices: The app will search for nearby compatible devices. Once the motor is detected, follow the on - screen instructions to complete the pairing process. This may include entering a PIN or confirming the connection.
Step 3: Configure Voice - Control Settings
- Link the Motor to the Virtual Assistant: In the smart home app, link the motor to the virtual assistant. This allows the virtual assistant to recognize and control the motor.
- Create Custom Commands (Optional): Many smart home platforms allow you to create custom voice commands for the awning motor. For example, you can say "Alexa, open the awning" or "Hey Google, close the awning." You can customize these commands according to your preference.
- Test the Voice Control: Once the configuration is complete, test the voice control by issuing commands to the virtual assistant. Make sure the awning extends and retracts as expected.
Troubleshooting Common Issues
- Connection Problems: If the motor fails to connect to the smart home hub, check the power supply, the Wi - Fi connection, and the pairing process. Make sure the motor is in the correct pairing mode and that the smart home hub is within range.
- Command Recognition Issues: If the virtual assistant does not recognize your commands, check the pronunciation and clarity of your speech. You can also try re - training the virtual assistant to better understand your voice.
- Motor Malfunction: If the awning does not respond to the voice commands, check the motor for any mechanical or electrical issues. Refer to the manufacturer's troubleshooting guide or contact our customer support team for assistance.
Benefits of Voice - Controlled Automatic Awning Motors
- Convenience: With voice control, you can operate the awning from anywhere in your home without having to manually operate a remote control or switch. This is especially useful when your hands are full or when you are relaxing on the couch.
- Enhanced Safety: Voice control reduces the need for physical interaction with the motor, minimizing the risk of accidents or injuries.
- Smart Home Integration: Integrating the awning motor with a smart home system allows you to create automation routines. For example, you can set the awning to open automatically in the morning and close in the evening.
Conclusion
Setting up voice control for an automatic awning motor is a straightforward process that can significantly enhance the functionality and convenience of your awning. As a supplier of high - quality motors for automatic awnings, we are committed to providing our customers with the best products and support. If you are interested in purchasing our motors or have any questions about setting up voice control, please feel free to contact us for more information and to discuss your specific requirements.

References
- Manufacturer's manuals for the automatic awning motors
- Documentation for smart home platforms (Amazon Alexa, Google Assistant, Apple HomeKit)